Butternut Cake with Bourbon Sauce

The first time our Mom made this cake and told me that it had butternut squash in it, I must admit I was extremely skeptical.  But, it’s cake, and not even what I thought was a strange ingredient was going to keep me away (notice that I did not think the bourbon was a strange ingredient).  I make this cake every Fall now. It seems to be the perfect start to weather that lends itself to sitting under blankets with a sweet treat and a cup of coffee.  And don’t worry, the alcohol in the bourbon cooks out…because you don’t want to skimp on this sauce!  ~Tracy

salt_20181014_220846_040.jpg

Ingredients for the cake:

  • 1 large butternut squash
  • 2 c. all-purpose flour
  • 2 tsp. baking powder
  • 2 tsp. ground cinnamon
  • 1 tsp. salt
  • ½ tsp. baking soda
  • 2 tsp. ground ginger
  • ½ tsp. ground cloves
  • 1 ½ c. brown sugar
  • ½ c. + 2 T. butter, softened
  • 2 eggs
  • ½ c. orange juice

Ingredients for the sauce:

  • 4 T. butter, softened
  • ¼ c. bourbon
  • ½ c. brown sugar
  • 1 c. heavy cream
  • 1 c. powdered sugar

Instructions: 

  1. Preheat oven to 400°F.
  2. Split butternut squash in half lengthwise and lay face down on a parchment lined or sprayed baking sheet.
  3. Roast for 45-60 minutes until fork tender (time will vary with the size of squash).
  4. Set the squash aside and allow to cool completely.
  5. Gently scoop out the seeds and stringy seed area and discard.
  6. Scoop out the squash and puree to a smooth consistency.
  7. Set pureed squash aside 1 ⅓ cup.
  8. In large bowl combine ½ cup + 2 T. of softened butter and 1 ½ c. brown sugar.  Mix until creamed together.
  9. Add eggs one at a time until combined.
  10. Add orange juice and squash puree mixing just until all are combined.
  11. Gradually add in flour mixture and mix on medium speed until all is incorporated into squash mixture.
  12. Pour into 9” bundt pan that has been sprayed with baking spray.
  13. Bake at 400 for approximately 40 minutes or until toothpick comes out clean.
  14. Cool for 20 minutes and turn out of bundt pan.

Instructions for sauce:

  1. Combine 4 T. softened butter, ½ c. brown sugar, and ¼ c. bourbon in a medium saucepan.
  2. Bring to a boil.
  3. Remove from heat and add heavy cream and powdered sugar while whisking.
  4. Return to heat and boil again, whisking continually.
  5. Reduce heat to a low simmer and slowly whisk while cooking approximately 8 more minutes or until mixture begins to thicken slightly.
  6. Cool to room temperature before pouring over cake.  You can poke a few holes in the top of the cake using toothpicks to help the sauce absorb into the cake.
  7. Reserve a small amount of sauce to pour over each slice.


Mom’s Apple Crisp

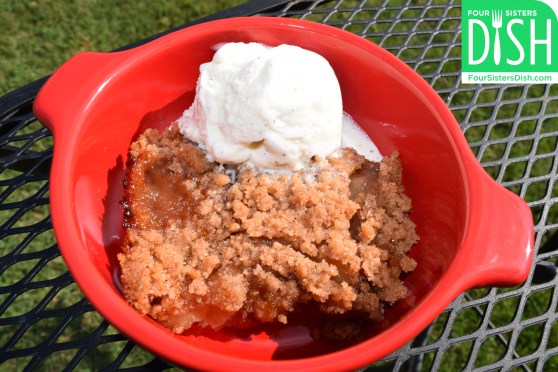
AppleCrispLogoI like cake and cookies as much as the next person, but my dessert of choice is almost always our Mom’s apple crisp.  In fact, I love it so much that it is my birthday request each July. It is so perfectly spiced, with such an incredibly crisp and buttery topping, that I absolutely cannot get enough of it. That sweet, crunchy topping against the tart soft Granny Smith apples is to die for.  And if you want to go extra crazy, you can hit it with a little vanilla ice cream too — on the side for sure, so you don’t miss out on the crunchy topping.

And yes, if you’re careful, you can gently wriggle candles through the crisp topping to get it birthday ready. You may or may not want to break with the cake for birthday traditions, but I guarantee you’ll feel like celebrating each time you have this dessert.   ~Robin

Ingredients:
  • 2 c. sugar
  • 1 ½ c. flour
  • 4 tsp. cinnamon
  • ½ tsp. nutmeg
  • ¼ tsp. salt
  • 2 sticks of cold butter (1 cup)
  • 8 Granny Smith apples, peeled, cored and sliced
  • Lemon juice (optional)

Instructions: 

  1. Preheat oven to 375°F.
  2. Cut all but apples and lemon juice together with a pastry cutter until evenly mixed. (*If you don’t own a pastry cutter you can use a fork as well, mashing it down with the back of the tines flat into the mixture, but it takes longer that way. Or just order yourself one here.)
  3. Place sliced apples into a 9×13 pan. Drizzle a little lemon juice over the apples (especially if apples are sweeter than is typical).
  4. Cover as evenly as is feasible (don’t worry too much about perfection here) with topping mixture.
  5. Bake until top is nice and crispy — will be a golden brown color (about 45 minutes).

Note: This recipe can be made with any variety of apple, but Granny Smith are the best for the perfect combination of tart and sweet!

This post contains affiliate links. We earn a small small commission on purchases made via these links.

Double Layer Pumpkin Pie

I got this recipe at a Weight Watcher meeting years ago.  When I say “years ago,” I mean back when you were given a point range (mine was 18-23 points per day) and when you ran out of points, you were stuck eating green beans for supper.  Thank goodness it’s not that way anymore!

I have made this pie with both sugar free pudding and regular, and it works well either way.  I’m not a fan of sugar substitutes so I figured the WW points both ways. I will say, however, I really can’t taste the sugar free aftertaste in this pie at all (you know what I’m talking about I’m sure, if you aren’t accustomed to using sugar substitutes).  My 11-year-old daughter didn’t even notice a difference!

I make this pie for Thanksgiving often and it’s always a popular dessert choice.  You can’t go wrong with cheesecake and pumpkin! ~Erin

salt_20180908_183543_234.jpg

Ingredients:
  • 4 oz. fat free cream cheese, softened
  • 1 c. plus 1 T. 2% milk
  • 1 T. sugar
  • 1 ½ c. Fat Free Cool Whip
  • 1 9-inch graham cracker crust (regular or reduced fat – doesn’t change points per serving)
  • 2 small packages vanilla instant pudding mix, dry (regular or sugar-free, fat-free)*
  • 1 (16 oz.) can pumpkin puree
  • 1 tsp. ground cinnamon
  • ¼ tsp. ground ginger
  • ¼ tsp. ground cloves

Instructions: 

  1. Mix cream cheese, 1 T. milk, and sugar in a medium bowl until smooth.
  2. Gently stir in whipped topping.
  3. Spread all but about ½ cup of the mixture on the bottom of the crust.
  4. Pour 1 cup of milk into a medium bowl; add both packages instant pudding mix and beat with a wire whisk or mixer until smooth. The mixture will be thick.
  5. Stir in pumpkin puree and spices; mix well.
  6. Spread the pumpkin mixture over the cream cheese layer; top with dollops of the remaining cream cheese mixture.
  7. Refrigerate at least 4 hours or, preferably, overnight.

WW Freestyle Info.: This recipe makes 8 servings. If using sugar-free, fat free instant pudding mix, each serving is 7 points. If using regular instant pudding mix, each serving is 12 points.

Honey Spice Cookies

A regular request of the grandkids when they’re at our parent’s house (and as you’d suspect, they usually get what they want at Grandma and Pappaw’s house), these cookies are the perfect chewy goodness with a cup of coffee or ice cold glass of milk.  I’ve been craving these cookies lately…I’m ready for those comfort foods that are perfect on a cool, crisp fall day.  You can keep your pumpkin spice latte.  I’m eating cookies!  ~Tracy

Ingredients:
  • 2 ¼ c. all purpose flour
  • 1 ½ t. baking soda
  • ½ t. salt
  • 1 t. ground ginger
  • ½ t. cinnamon (make this a heaping ½ tsp. if you love cinnamon like we do)
  • ½ t. ground cloves
  • 1 c. firmly packed brown sugar
  • ¾ c. vegetable shortening
  • ¼ c. honey
  • 1 unbeaten egg

Instructions: 

  1. In a small bowl, sift together flour, baking soda, salt, ginger, cinnamon, and cloves.
  2. In a large mixing bowl, combine brown sugar, shortening, honey, and egg. Beat well.
  3. Gradually add dry ingredients, mixing well.
  4. Chill dough for 1 hour.
  5. Shape rounded teaspoons full into balls.
  6. Dip half of each dough ball into water and then into sugar.
  7. Place sugar side up on parchment lined baking sheet.
  8. Bake in preheated oven at 350 degrees for 8 to 10 minutes.


Frozen Margarita Pie

School has started again here, but the 90+ degree temperatures have us hanging on to every bit of that summer feeling while we still can. I find myself longing for two things from summer my family loves – frozen treats and beach vacations.  If you can’t have both, make a dessert that reminds you of the beach!

IMG-0535.jpg

This Frozen Margarita Pie reminds me of something I’d eat at an ocean-side restaurant with sand on my feet – I could live in a place like that!  The pretzel crust on this pie really makes the difference by supplying that ‘salt on the rim’ flavor of your favorite sweet margarita.  Make.  Enjoy.  Close your eyes and dream of the ocean.  ~Tracy

salt_20180826_231518_335.jpg

Ingredients for crust: 
  • ~5 T. melted butter
  • ~¼ c. sugar
  • ~2 c. pretzel sticks, crushed
  • ~4 squares or two sheets of graham crackers, crushed
Ingredients for filling:
  • ~1 14 oz. can sweetened condensed milk
  • ~1/3 c. fresh squeezed lime juice
  • ~¼ c. limeade concentrate (such as Minute Maid)
  • ~2 T. tequila
  • ~1 ½ T. triple sec
  • ~1 c. heavy whipping cream, whipped
Ingredients for topping:
  • ~1 T. lime zest
  • ~whipped cream for garnish
Instructions for crust:
  1. Preheat the oven to 350°F.
  2. Mix melted butter, sugar, crushed pretzels and crushed graham crackers together. I use a big Ziploc baggie for this and simply knead the ingredients until well combined.
  3. Press the mixture in the bottom and up the sizes of a 9” glass pie plate, forming an even layer.
  4. Bake for 7 to 10 minutes; set aside the crust and allow it to completely cool.
Instructions for the filling:
  1. Squeeze the juice from limes (usually 3 to 5 limes) until you have 1/3 c. fresh lime juice.
  2. In a large bowl, combine lime juice, sweetened condensed milk, limeade concentrate, tequila and triple sec.
  3. Gently fold in the whipped cream until all ingredients are incorporated.
  4. Pour all ingredients into cooled crust and smooth.
  5. Sprinkle the top with 1 T. lime zest.
  6. Freeze at least 4 hours but overnight is preferable.
  7. To help release the frozen crust from the dish, you can place the dish in a very shallow dish of warm (not hot) water.
  8. Top with a dollop of whipped cream before serving if desired.

Easy Cheesecake

I have been making this cheesecake recipe for years and I’ve never had it fail me!  It’s quick to mix together, uses basic ingredients, and when it’s baked it’s smooth and creamy.   I love lemon curd to top mine (reminiscent of my favorite Cheesecake Factory indulgence); my boys love cherries.   It’s up to you to personalize in your favorite way! ~Kathy

salt_20180730_174916_414.jpg

Ingredients:
  • 2 (8 oz) packages cream cheese, softened to room temperature
  • ½ c. sugar
  • ½ tsp lemon juice
  • 1 tsp vanilla
  • 2 eggs
  • ½ tsp lemon zest, optional
  • 1 prepared graham cracker crust (I like the larger one that says “2 extra servings”)

Instructions: 

  1. Preheat oven to 350˚F.
  2. In a large bowl, using an electric mixer, blend cream cheese until smooth.
  3. Add sugar, lemon juice and vanilla. Combine well.
  4. Add eggs, one at a time, mixing well after each, until fully incorporated. Mix in lemon zest if using.
  5. Pour into crust, smooth the top.
  6. Place in oven and bake 35 – 40 minutes, until center is almost completely set.
  7. Allow to cool then chill in refrigerator.
  8. Top with your favorite topping, or eat plain.

Bread Pudding Lightened Up

I’ve had something like this in mind for a while now.  I wanted a bread pudding I can eat without guilt.  It’s taken me a few fails to figure out a good recipe.  For instance, while 2-ingredient dough bagels are delicious, they do not make a good bread pudding.  That turned out bad.  This cinnamon swirl bread is perfect though!  It’s already mildly sweet and cinnamony.  The sweet bread soaked in a protein shake custard is just the combination I was looking for!  I can even eat this for breakfast and feel like I’ve started the day right!  ~Erin

salt_20180727_210655_053.jpg

Ingredients:
  • 2 ½ slices Pepperidge Farm Cinnamon Swirl bread
  • ½ of an 11 oz. carton of Vanilla Premier Protein Shake
  • 1 egg, beaten
  • ¼ tsp. cinnamon
  • 2 tsp. sugar
  • Caramel ice cream topping, regular or sugar free (optional)

Instructions: 

  1. Air fryer and conventional oven cooking instructions are included below.
  2. If using a conventional oven, preheat it now to 350°F.
  3. Tear the bread into small pieces and place into a ramekin or oven safe mug; lightly pack together.
  4. In a small bowl, beat together the egg, protein shake, cinnamon, and sugar to make a custard.
  5. Slowly pour the custard mixture over the bread, until all the bread is soaked but not swimming in custard; discard any leftover custard mixture – there shouldn’t be much if any.
  6. For air fryer: Cook at 350°F for 10 minutes.
  7. For conventional oven: Cook in the preheated 350°F oven for 45, until the top is brown.
  8. Drizzle with caramel ice cream topping, if desired.

WW Freestyle Info.: This recipe makes 2 servings. Each serving is 5 points, not including caramel topping.

*This post contains affiliate links.  We earn a small small commission on purchases made via these links.

Air fryer and conventional oven cooking instructions are included below.

Check out getting your own air fryer at Amazon here:

Here is the bigger one (6 qt.!) that we love even more, but it was not available on prime when we checked last, though that sometimes changes:

Tropical Carrot Cake Breakfast Bites

20180626_152837_1530044939517

The view from our rental.

BeachSelfie

My husband and I just got back from an awesome beach vacation with some great friends, and I think I was trying to bring back a little of that ocean-side vibe when I started experimenting with these flavors.  Little did I know I was creating what would quickly become one of my very favorite Weight Watcher friendly items for breakfast or just a sweet treat. You won’t believe that these are only one point each.  They’re sweet, fruity, and melt-in-your-mouth fabulous.  If you have an air fryer (my favorite is this Go Wise Air Fryer)*, they reheat to perfection there with tasty caramelized edges. Mmmmm.  ~Erin

TropicalCarrotCakeBiteLogo

Ingredients:
  • 1 (20 oz.) can crushed pineapple in juice
  • 1 medium banana
  • 1 c. very finely chopped carrots (use a food processor if available)
  • 1 egg
  • 1 (5.3 oz.) container Dannon Light & Fit Greek 80 Calorie Yogurt – toasted coconut flavor
  • 1 1/4 c. self-rising flour
  • ½ tsp. ground cinnamon
  • Nonstick cooking spray

Instructions: 

  1. Preheat the oven to 350°F.
  2. Spray a muffin tin with cooking spray and set aside.
  3. Drain the pineapple of as much liquid as possible by pressing it with a rubber spatula through a strainer; transfer pineapple to a medium bowl.
  4. Mash banana and combine with pineapple; stir in chopped carrots, egg, and coconut yogurt until well combined.
  5. Stir in self-rising flour and cinnamon until just combined.
  6. Use a scoop to fill each muffin cup 2/3 full.
  7. Spray the tops with a bit of cooking spray to help them brown.
  8. Bake 25 minutes in a preheated oven or until light golden brown.

WW Freestyle Info.: This recipe makes 12 servings. One breakfast bite is 1 point; two breakfast bites are 3 points.

*This post contains affiliate links.  We earn a small small commission on purchases made via these links.

Raspberry Ice Cream Chill

Here in our little town, we have had the great fortune of developing a truly close group of friends.  Friends that you consider family are one of life’s greatest strokes of luck – and we’ve been very lucky.  One of our favorite things to do as a group is to get together at someone’s house and eat. The late Julia Child is quoted as saying that “Dining with one’s friends and beloved family is certainly one of life’s primal and most innocent delights.  One that is both soul-satisfying and eternal.” Word, Julia! But, if you want a group of kids to have a soul-satisfying meal experience, there’d better be some dessert. Take this easy, no-bake ice cream dessert to your next get together and satisfy someone’s soul. ~Tracy

Ingredients:
  • 1 family size package Golden Oreos (if you can’t find these you can make a traditional graham cracker crust)
  • 3 T. melted butter
  • 3 quarts of vanilla ice cream
  • 1 pint raspberry sorbet (I use Talenti brand)
  • 1 cup seedless raspberry jam (I use Smuckers)
  • 8 to 12 oz. (depending on how much you love them) frozen raspberries

Instructions: 

  1. Set out your vanilla ice cream and sorbet so that they may become slightly soft and easy to spread. Don’t allow them to completely melt. You want them to be about the consistency of a malt.
  2. Crush the Golden Oreos. I prefer to use my food processor for this, but if you don’t have one, or just don’t want to mess with cleaning yours, you can always crush the cookies in a large Ziploc baggie.
  3. Pour in melted butter and pulse food processor or knead bag until butter is incorporated into the crushed cookies.
  4. Reserve 1 cup of crushed cookies to use as topping.
  5. Spread the remaining crushed cookies into the bottom of a 9 x 13 pan that has been sprayed with non-stick spray or lined with parchment. Press them firmly in place to form cookie crust.
  6. Place the cookie crust in the freezer for about 15 minutes to allow it to become more firm.
  7. Between each layer be sure to place the pan back in the freezer for 15 to 20 minutes (or a little longer if you’re more patient than I am). This will allow the dessert to stay “layered” and keep the various layers from mixing together.
  8. After crust has chilled, spread about 1 ½ quarts of the vanilla ice cream on top of the cookie crust, forming the first layer of the dessert. Don’t forget to re-chill between layers.
  9. On top of the vanilla ice cream, spread the entire pint of raspberry sorbet.
  10. Stir the cup of raspberry jam well to loosen it and make it more spreadable. Spread the jam on top of the raspberry sorbet.
  11. Gently break up the frozen raspberries by squeezing the bag gently with your hands. Frozen raspberries are generally very tart. I like the tartness as a companion to the sweet ice cream, but if you don’t think that’s your “jam” (ha!) then add a couple of teaspoons of sugar before spreading them.
  12. Spread the frozen raspberry pieces on top of the raspberry jam.
  13. Top with the final 1 ½ quarts of vanilla ice cream.
  14. Lastly, sprinkle the remaining cookie crumbs all around the top of the last ice cream layer.
  15. Freeze for at least 4 hours to allow the layers to firm together. I recommend freezing overnight if possible.
  16. Use a knife dipped in warm water to cut through the ice cream as you get ready to serve.

Summer Ice Box Pie

Many years (and pounds) ago, when I first started Weight Watchers, I was given a recipe similar to this by a friend who had been a Weight Watcher for years. I was desperate for something that made me feel like I was having dessert! That was over a decade ago and my family and I are still enjoying this cool, summery treat. You can make this pie using any flavor combination of yogurt and Jello that you want. For the one pictured here, I used strawberry Jello with lemon yogurt. ~Tracy

Summer Yogurt Pie.jpg

Ingredients:
  • 1 (.3oz) package sugar free jello in your favorite flavor – I used strawberry
  • 2 (8 oz.) containers low fat yogurt – I used lemon (mine were 4 points each)
  • 1 c. boiling water
  • 1 (8 oz.) container fat free Cool Whip
  • 1 reduced fat graham cracker crust
  • Fresh fruit for topping, optional

Instructions: 

Stir Jello into boiling water and mix until well dissolved.

Add both containers of yogurt and mix well.

Fold in Cool Whip.

Pour mixture into graham cracker crust.

Chill until ingredients are set.

Top with fresh fruit and serve.

WW Freestyle Info: Divided into 8 servings, this dessert is 7 points per slice.