Spicy Pimento Cheese

Are there foods that you wouldn’t touch as a kid that you later realized were actually really tasty?  There are several things on that list for me, but one of my adult-discovered favorites is pimento cheese. Looking through random recipes one day, I realized that with the addition of a little spice, pimento cheese had a lot of potential! By adding the jalapenos for just the right kick and using a good quality cheddar cheese, I turned pimento cheese into one of my favorite snacks or lunches.  I really think you’ll love it too!  ~Tracy

Four Sisters Dish Spicy Pimento Cheese

8 oz. softened cream cheese*

¾ c. mayonnaise (don’t use Miracle Whip)*

1 T. Sriracha sauce

3 T. finely chopped yellow onion

2 garlic cloves, minced

½ tsp. celery salt

¼ tsp. kosher salt

3 T. finely chopped pickled jalapeno

1/3 c. chopped roasted red peppers

2 chopped scallions (using all of white and approx ½ of greens)

1 8 oz. block reduced fat sharp white cheddar, grated (equal to about 4 cups)*

toasted French bread or crackers for serving

In a large bowl, cream together cream cheese, mayonnaise, and Sriracha. Stir in onion, garlic, celery salt, and kosher salt. Add the jalapeno, scallions, and red peppers. Stir gently to avoid breaking up the peppers further. Finally, gently stir in the cheddar cheese. Serve on toasted French bread or with crackers. Refrigerate unused portion.

Note:  Depending on the level of spiciness you like, you can add more or less jalapeno.  Keep in mind that jalapenos sometimes become a bit more spicy the longer they sit within a mixture.

*Use either Fat-free mayo and cream cheese or reduced-fat mayo and cream cheese (see WW Info. below for points).  Both versions were figured using reduced-fat cheddar.

WW Info: 5 points per half-cup serving on all three plans if using fat free mayo & cream cheese; 8 points per half-cup serving on all plans if use reduced fat mayo & cream cheese. Both points values are figured with reduced-fat cheddar. Points values do not include crackers or bread.  

WW Info: If use fat free mayo and cream cheese, this recipe is 5 ww points on all plans for a 1/2 c. serving; with reduced fat mayo and cream cheese, it’s 8 ww points on all plans for a 1/2 c. serving. Makes 8 servings. Bread or crackers not included in points.


Spicy Air Fried Chickpeas

All the Christmas in July talk had me craving my Chistmas snacks.  For the last several Christmases my friend Kena has gifted us a large bag of her spicy pretzels.  They are so good and I look forward to her gift of them every year (are you reading this Kena?)!  They have the perfect combination of a salty crunch with a bit of spice to them.  The ONLY negative is that the pretzel recipe has a pretty significant about of oil in the ingredients.  I am a snacker, and often find myself looking for something to munch on.  These chickpeas satisfy my craving for that spicy crunch, but keep the snack on the healthier side  – and they let me keep looking forward to Kena’s Christmas pretzels! ~Tracy

chickpeas

Ingredients:

  • 1 15 oz. can chickpeas, drained and rinsed (I used Bush’s Organic Garbanzo Beans)
  • ½ tsp. garlic salt
  • ¼ tsp. lemon pepper
  • ½ tsp. red cayenne pepper
  • ¼ tsp. onion powder
  • 1 T. powdered ranch dressing mix
  • dash salt
  • dash black pepper
  • Canola oil cooking spray

Spread chickpeas evenly in one flat layer on paper towels.  Allow them to dry on the kitchen counter for three to four hours, rolling them occasionally so that they evenly dry on all sides.

Lightly spray chickpeas with canola oil cooking spray.  Roll them around and lightly spray again making an effort to coat them lightly, but evenly.

In a large zip style baggie, combine all dry ingredients and shake to combine well.  Add the sprayed chickpeas to the bag, seal, and gently shake to coat the chickpeas with the spice mixture.

Place chickpeas in the basket of air fryer and cook on 340 for 14-16 minutes. You can click here for the link to my air fryer.

Air fryers vary in power, so begin to check the chickpeas at about the 14 minute mark for the desired crispiness.  My family likes them very crispy, but I don’t mind them with a little softness in the center.  You can experiment with what you like.

Chickpeas are ZERO WW points!  Some may argue that with the cooking spray these should be counted on WW, but per serving I’m not going to count the negligible amount.

Honey Garlic Shrimp

Have you seen the meme on social media that says “January was a hard year but we made it.”?  That makes me chuckle because it must be the universal feeling everyone is having, me included.  It was LONG month. Not bad, just long. I guess because November and December just flew right by, the slower pace of the new year seemed to crawl in comparison.  

January has finally come to a close and, while I’m not one to wish time away, I’m happy to see February… mostly because it’s one month closer to Spring.  

Food-wise, winter has been a season of belly-warming comfort foods for me.  I have fully enjoyed all the foods and have about 7 pounds to show for it. Time to stop eating like I’m participating in hibernation.  While I love comfort foods, I truly appreciate a dinner that is not so heavy. This Honey Garlic Shrimp is sweet and spicy and, of course, garlicy… hence the name.  It’s also super-fast to make. We’re talking like 15 minutes start-to-finish. Can’t beat that! I can throw this on the table after work in no time and have a meal everyone will enjoy!  That’s why it’s part of my weeknight dinner rotation. I’m confident it will soon be part of yours as well. ~Erin

Ingredients:
  • 2 lbs. medium-sized shrimp that have been shelled and de-veined
  • 1 T. minced garlic
  • 2 tsp. sesame oil or olive oil
  • ¼ tsp. grated ginger root or 1/8 tsp. dry ginger
  • ½ c. less-sodium soy sauce
  • ½ c. water
  • 1 T. cornstarch
  • 2 T. honey
  • Crushed red pepper flakes, to taste; optional
  • Chopped green onion
  • Cooked rice, for serving

Instructions: 

  1. Add the shrimp and cook about 4 minutes.
  2. Flip the shrimp and add the remaining ½ tsp. of oil, the garlic, and the ginger. Cook for 3 or 4 more minutes, until the shrimp is cooked and the garlic and ginger are fragrant.
  3. Remove the seasoned shrimp from heat and transfer to a plate.
  4. Return the skillet to the stove and turn the heat up to medium-high. Immediately add soy sauce and water to the skillet. When it begins to bubble, add the cornstarch, whisking continuously, until thickened. This will take just a couple minutes.
  5. Turn off the heat and whisk in the honey.
  6. Return the shrimp to the skillet and stir to coat the shrimp and warm through.
  7. Serve over rice. Garnish with green onions and sprinkle with crushed red pepper flakes, if desired.

WW Freestyle info.: This makes 4 servings. Each serving is 3 points, not counting rice.

Chipotle Chicken Wontons

I worked at El Chico the summer after college, and I have quite a few stories I could tell you about working there. The manager let me off work on short-notice the night my first nephew Hayden was born, so I’ll always appreciate that.

A less enjoyable day: when the walk-in floor was slick — and I bit it while holding a 5 gallon bucket of salsa when my feet slipped out from under me. The salsa vat went directly up into the air above my head and landed just next to me (not on my head or I would have officially felt like a Loony Tunes character). What didn’t land next to me was all the salsa. After it coated the ceiling and a good 5 meter radius in the kitchen, the biggest portion of it splashed directly on my head and all over my body. You will never know the speed with which you can undress until you’ve driven home before your evening shift (luckily I happened to be finishing my lunch shift) completely coated in salsa. I have a high tolerance for spicy food…when I’m eating it. Apparently it’s quite different when you’re wearing it, in case you were considering this as some strange form of bath-time aromatherapy. Don’t.

That’s all the wisdom I have to share today. 😉 Also maybe some more practical advice: make sure your shoes are grippier than mine were if you ever find yourself working in a restaurant!

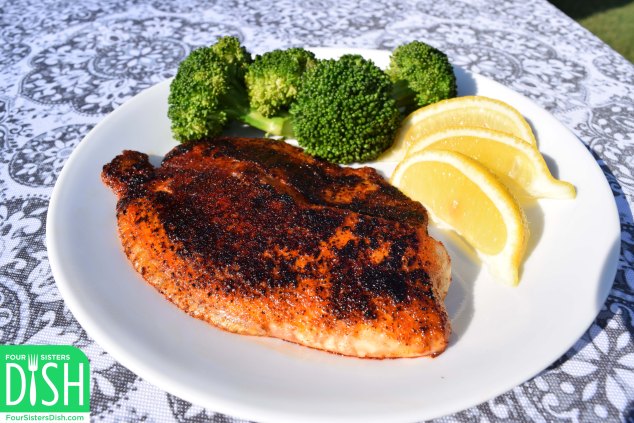
Anywho, one thing I did love about working there was the free meal during my break on each shift. My favorite was a chipotle chicken breast – it was smothered in a chipotle pepper sauce, and I absolutely loved it. This was the first time I had tried anything chipotle flavored – this was ages before “chipotle” was being mispronounced by 60% of people in a zillion fast food restaurants. To this day, I crave that dish.

I tried out this chipotle chicken mixture at home as a quick dish on its own, and we really loved it all by itself with some sides. But when I decided to try it in wontons…that’s when it became a super fun and delicious recipe! And it makes these little beauties a handy appetizer too if you have a different entrée in mind. ~Robin

ChipotleCknWontons_logo

Ingredients:

10 oz. boneless, skinless chicken breast, cubed into bite sized pieces

2 oz. Chipotle peppers in adobo sauce (I use La Costena; there is a little heat to these, so you might cut back to 1 oz. if you’re not sure about the heat)

¾ c. canned black beans, rinsed

1 c. white onion, diced

½ tsp. garlic salt

5 oz. egg roll wraps (12 wraps, trimmed down as instructed below to about half of their original size by cutting across the corners; I use Twin Dragon)

4 cloves of garlic, minced

¼ c. green onions, chopped (optional, though I think something colorful on top is pretty essential)

¼ c. cilantro, minced (optional)

2 medium jalapeños, sliced (optional)

1 or 2 T. fresh squeezed lime juice (I just squeeze directly from the lime so amount is approximate), optional for serving

Instructions:

Preheat oven to 400°F.

Rinse black beans and set aside.

Measure 2 oz. of the chipotle peppers in adobo sauce; chop well and add to a medium mixing bowl, sauce included. Mince garlic (you can also use jarred minced garlic) and add to bowl. Chop white onion and add it to this bowl as well. Chop chicken breast into bite sized pieces and add to the mixing bowl. Add garlic salt. Stir all together; then set aside.

With a clean knife, chop green onion; set aside. Mince cilantro if desired; set aside. Slice jalapeños if desired; set aside.

Trim egg roll wrappers (what I’ll call wontons from here on) down to about half their size, cutting across the corners with kitchen shears as shown in the video below. (I’m working on my video editing skills so, yes, you can hear my husband say “go” as it starts–oops! I think he just needs to work on his videography skills — who says “go” after they start recording?!)

Very lightly spray a muffin tin (12 cups) with cooking spray, and place trimmed wontons in cups. You may need to press some folded portions against the wall of the muffin tin so that there will be room for filling later (do not adding filling yet or you’ll have soggy wontons). Cook wontons until crisp as shown in this below video (8 ½ -10 minutes). (Before testing wontons to see if cooked enough, make sure you’ve given them a few minutes so they are cool enough to touch.)

The bottoms of each wonton should make a clicking sound when you tap it with your fingernail, and there should be no flexibility in the wonton. If it will bend when the sides are squeezed, it isn’t quite done. Keep an eye on wontons and cover with foil if edges begin to brown too much.

While the wontons are cooking, on medium heat, cook chicken mixture in a nonstick skillet until thoroughly cooked, stirring frequently. You do not need additional oil; the chipotle peppers provide just enough to cook the mixture. When the chicken is nearly cooked, add the black beans and gently stir them into this mixture in your pan. Remove from heat when chicken is cooked through (165 degrees F in the middle of the largest pieces).

If you follow the recipe by prepping your parts of the recipe ahead of time as it’s noted here, the wontons and chicken should be done at about the same time, and your food won’t get cold.

Add the hot chicken mixture to the wontons in the muffin tins as soon as they’re ready (chicken will likely be ready a minute or two before the wontons but not long enough to get cold), topping with green onions, as well as the cilantro and jalapeños if desired.

I squeeze fresh lime juice onto mine when serving, though they’re great without this too if you’re not a big fan of lime – or just want to savor that awesome chipotle flavor.

Weight Watchers Info.: Each filled wonton is precisely 1 Freestyle SmartPoint each, so it’s easy to make a meal out of these tasty treats. And all the garnishes are free, so play with those — or not — to your heart’s desire! (Note: Be sure to trim wontons to about half the size — that’s not only for looks; it also really reduces the points.)

Thai Chicken Pizza

My family loves pizza. What’s not to love?  But I get tired of the same, run-of-the-mill basics.  They are good, but come on.   I’ve got to have some variety, y’all!

When I was going to college, there was a little, local restaurant in Stillwater called the Thai Cafe, which I loved.  I miss it!  Now, I have to travel quite a ways to get Thai food.  So I came up with this jazzed up, easy to make, tasty pizza, combining some of my favorite flavors.

It is our new favorite!   ~Kathy

ThaipizzaLogo

Ingredients:

1 pizza crust (your favorite recipe or refrigerated — I used Pillsbury thin crust refrigerated dough; points figured with this dough selection)

3 to 4 T. Chili Garlic Sauce*

1 heaping c. chicken breast, cooked and sliced thin**

1 medium red bell pepper, sliced thin, seeds removed

1 small zucchini, sliced ¼ inch thick

Red onion, sliced thin (about 2 slices)

1 ½ c. shredded low moisture, part skim mozzarella cheese

½ c. shredded mild cheddar cheese (reduced fat, if following WW)

2 T. cilantro (for optional garnish)

Instructions:

On a lightly greased baking sheet, roll pizza crust out into a rectangle, about 10 x 14 inches.

Spread sauce over crust, very thinly.

Spread remaining ingredients over pizza as desired, ending with cheeses.

Bake according to crust directions, until golden brown, cooked through and cheese is melted.

Garnish by sprinkling with cilantro once it’s cooled a little (optional).

Notes:

*Chili garlic sauce is found in the Asian food section (see photo).  It is full of flavor and some heat.  Use 3 Tablespoons if you like it mild/warm.   If you want it warmer, use up to 4 Tablespoons.  It doesn’t look like much on the crust, but it gives plenty of flavor!

**I used chicken breasts boiled with some onion, garlic, salt and pepper. Once drained and cooled, slice thin.   Rotisserie chicken breast would also be a good substitute.

Weight Watchers Info:  This makes 6 servings, 8 Freestyle SmartPoints per serving.

Southwest Chicken Spaghetti

I had tried several recipes for this over several years and was starting to think I just didn’t like chicken spaghetti. Some were too soupy, others were swimming in cheese, and many were just flavorless.

I finally just scrapped every recipe I had ever tried and started over with my own.  This has a touch of a kick from the Ro-Tel that you can customize to your own taste (substitute some petite diced tomatoes instead!) but also just a really nice flavor from the Ro-Tel, green onion, garlic, and cilantro…It’s cheesy but not just a giant blob of Velveeta.  This is finally, finally, finally, it!  Hope it’s just right for you too.  One more note:  This makes a LOT of food (14 one-cup servings) but you could easily cut the recipe in half if you have a smaller crowd to feed.  ~Robin

ChickenSpaghetti_logo

Ingredients:

  • 16 oz. Barilla whole grain pasta spaghetti
  • 2 lbs. boneless, skinless chicken breast, cooked and shredded
  • 16 oz. Velveeta cheese, chopped into 1” cubes
  • 4 cans (10 oz. each) of Ro-Tel tomatoes & green chilies, drained (I use original but if you aren’t into spice, you could use mild too)
  • 1 ½ c. green onions, chopped (reserve ½ c. to garnish the individual servings)
  • 2 to 3 tsp. garlic salt to taste
  • ¼ c. cilantro, finely chopped
  • 2 oz. of Kraft 2% mild cheddar cheese (for topping)DSC_0209

Instructions: 

Cook the spaghetti according to package directions; drain.

Preheat oven to 350°F.

While noodles are still hot, add Velveeta and stir until melted.

Add shredded chicken, 1 c. chopped onions, drained Ro-Tel, garlic salt, and cilantro; stir until combined.

Spread the mixture in a 9×13 baking dish and sprinkle cheddar across the top.

Bake at 350°F until bubbly and hot throughout (25-30 minutes).

Sprinkle servings with additional green onion if desired.

WW Freestyle Info.:  Makes 14 one-cup servings at 7 points each. 

Crockpot Jalapeno Popper Chicken Chili

I love anything I can put in the crockpot and basically forget about all day. This is one of those recipes. It’s beyond simple. The only real prep work is chopping the jalapenos. You know the appetizer where jalapenos are hollowed out, stuffed with creamy cheeses, wrapped in bacon, and cooked until hot and bubbly? This has all that flavor — but in soup form! It’s not overly spicy since you remove all the seeds and ribs from the jalapenos (that’s where the heat is) but it’s infused with that delicious peppery flavor. Topped with some bacon bits and shredded cheese, I’ve turned the popular popper into a warm bowl of comfort food. So easy, cheesy, and bacon-y.  Yes, that’s a word… at least in my vocabulary. Bacon makes everything better!  ~Erin

JalpenoPopperChiliLogo

Ingredients:

  • 2 lbs. boneless, skinless chicken breast (frozen in single pieces)
  • 4 oz. Greek or Reduced Fat cream cheese, softened
  • 1 (10.75 oz.) can condensed cheddar cheese soup
  • 4-5 large fresh jalapenos, seeded and chopped
  • 32 oz. fat free chicken stock
  • 1 tsp. onion powder
  • 1 tsp. garlic powder
  • 1/2 T. salt
  • 3 (15.5 oz.) cans cannellini beans, drained and rinsed
  • 1 tsp. black pepper
  • For serving:  real bacon bits (I like to cook mine for a few minutes in a small skillet to crisp them up.), reduced fat shredded cheddar or Mexican blend cheese, chopped pickled jalapenos, chopped green onions

Instructions:

In the pot of your slow cooker, whisk together softened cream cheese and condensed cheddar cheese soup until well combined.

Whisk chicken stock, salt, pepper, onion powder, and garlic powder into cream cheese/soup mixture.

Add jalapenos and frozen chicken breast. (You can use thawed chicken breast as well but keep in mind, it will cook faster.)

Cook 4-5 hours on high or 7 to 8 hours on low. When 1 hour of cook time is left, remove the chicken breasts from the pot, shred, and return to pot. Add cannellini beans and continue to cook for the last hour of cook time.

To serve, top each bowl with 1 tablespoon real bacon bits, ¼ cup reduced fat cheese, and, if desired, pickled jalapenos and green onions.

WW Freestyle Info.:   

This recipe makes 8 servings.  Each serving is 13 ounces (weight) or about 1 ½ cups.  Each serving is 3 points.

By adding the suggested amount of bacon bits (1 point) and reduced fat cheese (3 points), the total value of each serving would be 7 points/serving.

White Chicken Chili

I couldn’t ever find a white chicken chili I liked, so after trying several “meh” recipes, I decided to make my own.  Threw this together on a whim thinking it would at least be a quick, easy weekend prep to weekday meal kind of item.  But it turns out that Barry declared this his favorite thing I’ve ever made, so I figured I better share.  I make this pretty spicy but you can adjust (or eliminate) the heat easily. ~Robin 

WhiteChickenChileLogo

*This post contains affiliate links.  We earn a small commission on purchases made via these links.

Ingredients: 

  • 2 T. olive oil
  • 2 medium yellow onions, diced*
  • 4 medium jalapeño peppers, seeded, diced (reduce for lessened spice)
  • 4 4-oz. cans (2 c.) chopped Hatch** green chiles; don’t drain (I use mild on these – more for flavor than heat)
  • 4 cloves minced fresh garlic (or about 2 tsp. minced jarred garlic)
  • 13 c. low-sodium chicken broth (can always add more if you need it, but you don’t want it too soupy)
  • 4 c. cooked shredded chicken breast
  • 3 cans cannellini beans, drained well
  • 3 T. fresh lime juice (I just juice one small lime)
  • 1 T. cumin
  • 1 – 3 tsp. crushed red pepper flakes (I do the whole tablespoon because I like it spicy!)  
  • 23 c. cilantro (about 1/2 a bunch) chopped; reserve some for garnish
  • 12 tsp. garlic salt
  • Optional garnishes/accompaniments (not figured in WW points): sliced avocado, shredded Monterey jack cheese, tortilla chips, and/or a cilantro sprig.

Instructions:

In a large stock pot or Dutch oven, heat olive oil on med-high heat. Then add onion, jalapeño, chiles, garlic, and sauté for 5-7 minutes (until veggies soften).

Reduce to medium heat. Add drained beans, chicken, broth, cumin, lime juice, garlic salt (sounds like a lot of garlic, but it’s a whole lot of food too — trust me), cilantro, & red pepper flakes. Cook for 12-15 min.

Serve and garnish as desired.

Weight Watchers Info.: This makes a whopping 11 one-cup servings.

Old SmartPoints:  4 points per cup

Freestyle Points:  1 point per cup

*For easy onion dicing, using a gator chopper will save you some tears, literally. They have varied dicing sizes, so be sure to check on that before purchasing – I used one with a ¼ inch dicing size, but you could use a larger one as well. I used to hate chopping onions before my folks got me this for Christmas one year. Now I can chop without tears and much more quickly.  

**You can use any chopped green chile, but I prefer Hatch chiles.  

Smoky Blackened Tilapia

SmokyBlackedTilapiaLogo

Growing up, I loved to fish. It was one of my favorite ways to spend time with my dad — and his parents, Mammaw and Pappaw, before they passed.  They were big crappie (important note: pronounced “croppy”) fishers, which is still my favorite fish to eat.

My dad and I have clocked many hours at my aunt & uncle’s pond, on the river (for catfish, but no noodling for us, thank you very much!), or–when we could get there, out on the lake, usually angling for bass. I am still filled with peace picturing being out on the water at Pine Creek Lake in SE Oklahoma as the sun rises with a thick mist across the water, surrounded by pine trees.  It never really matters if they’re biting on a day like that.

Having a big fish fry after a morning of fishing was almost as much fun as the fishing itself.  As I’ve gotten older I a) have less time to do the fishing myself, alas, and b) have been trying to find healthier ways to prepare it than the cornmeal frying I grew up with — though I still love a big fish fry now and then. Don’t get me wrong!

Fortunately, I also get my love of all things spicy from my dad’s side of the family, and this blackened tilapia I threw together tonight after some fiddling with different possibilities is simple to make, a really fast meal, and scrumptious!

~Robin

Ingredients:

  • 16 oz. tilapia, 4 fresh fillets (about 4 oz. each when cooked)*
  • 34 tsp. packed light brown sugar
  • 1 ½ tsp. garlic salt
  • ½ tsp. to 1 1tsp. ground cayenne pepper (depending on desired spiciness—1.5 was pretty warm, but I love spicy food so that was perfect for me)
  • 2 T. smoked paprika (I like McCormick’s organic)
  • 2 T. extra virgin olive oil

Instructions:

Mix all ingredients except fish and olive oil in a small bowl and set aside.

Pat fillets of fish dry with a paper towel.

Sprinkle seasoning on the fillets of fish generously & coat evenly on both sides.

Heat 2 T. of olive oil in a large skillet on med-high heat.

Cook all fillets for about 3 1/2 minutes on the first side, then 3 minutes on the 2nd side — or until cooked through, opaque white and flaky.

Weight Watchers Info.: 4 SmartPoints on the Freestyle plan for a 4 oz. filet; 5 SmartPoints under the old plan.

*If you have frozen fillets, be sure to thaw and pat dry with a paper towel before you begin cooking.

Spicy Roasted Cauliflower – Two Ways (Spiced & Buffalo Style)

Cauliflower_SpicyRoasted_logo

Spiced Cauliflower

Cauliflower_Buffalo_logo

Buffalo Cauliflower

Both these cauliflower recipes are pretty much on repeat in my house.  Raw cauliflower?  Nope.  But roasted cauliflower is amazing!  I like it with several different seasoning variations but these two are my favorite. Both my kids even like the spiced one… one insists on dipping in ranch dressing but I still consider it a win!  My son will eat the buffalo version, but I’m not going to lie — it’s too spicy for my daughter.  My husband, Albert, and I love both versions.  Sometimes we make the buffalo version and just eat it all by itself (with Ranch) for lunch. ~Erin

Spiced Cauliflower Ingredients:

  • 1 large head of cauliflower, washed, stem & leaves removed, cut into small pieces
  • 1 T. olive oil
  • 1 tsp. granulated garlic
  • 1 tsp. cumin
  • 1 tsp. paprika (I used smoked paprika but you can use either.)
  • ¼ tsp. chili powder
  • ¼ tsp. onion powder
  • ¼ tsp. garlic salt (regular table salt is fine if that’s all you have)
  • dash of cayenne pepper
  • nonstick cooking spray

Buffalo Cauliflower Ingredients:

  • Cauliflower (one or two heads), washed, stem & leaves removed, cut into small pieces
  • Frank’s Red Hot Buffalo Wing Sauce
  • Cooking spray
  • Foil (highly recommend – the cooked-on sauce is hard to scrub off)
  • Ranch or blue cheese dressing for dipping, optional

Spiced Cauliflower Instructions:

Preheat the oven to 375° F.  Spray a large sheet pan with nonstick cooking spray; set aside.  In a small bowl, combine olive oil and all spices.  Pour spice/oil mixture into a gallon size resealable baggie.  Squish (Yes, that’s a technical term.  Ha!) the oil mixture around to coat the bag.  Open the bag and pour in the cauliflower pieces.  Squish it around again to evenly coat the pieces.  Pour the coated pieces onto the prepared sheet pan and spread evenly into one layer.  Roast for 20-25 minutes, until the edges & small pieces begin to brown.

Buffalo Cauliflower Instructions:

Preheat the oven to 375° F.  Cover a sheet pan with foil.  Coat it with non-stick cooking spray; set aside.  Place cut cauliflower in a gallon size baggie.  Pour in Frank’s wing size, a little at a time, sealing and shaking the bag to coat the cauliflower each time.  Add more if needed, until all the pieces are LIGHTLY coated.  Spread the cauliflower on the prepared sheet pan; roast in the oven for 20-25 minutes, stirring occasionally.  Serve with Ranch or blue cheese dressing.

WW Freestyle Info.: The Buffalo version is 0 points.  The spiced version is 4 points for the entire recipe (divide as you wish or eat the whole thing) because of the olive oil.  You could easily make it 0 points as well by coating the cauliflower in cooking spray instead of oil.